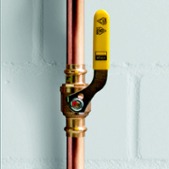
One of the great things about pressing is that the technology is a quickly adaptable skill, that provides consistency among your crew of installers.
However, like any plumbing technique, there are tips and tricks that make it a little easier. We’ve collected some of the most useful insider knowledge about the ProPress system (some of which came from our customers) and are sharing it with you.
How to deburr a press fitting
Sometimes, pressing a ProPress fitting or valve can leave a sharp edge or burr behind on the hub of the fitting. This doesn’t affect the performance, but why leave something behind that might scratch someone or catch on a tool?
Getting rid of the burr doesn’t have to be hard. Simply move the press tool backward and forward. It releases the jaw and knocks off the burr.
How to use ProPress for up to 4" copper
Did you know that Viega offers ProPress fittings up to 4”? Viega ProPress can be used on types K, L and M hard drawn copper up to 4". Don’t use it on DWV pipe because that is too thin to stand up to pressing.
You also can press on soft drawn copper from ½" up to 1¼". See more here:
How to prep pipe for ProPress
Prepping 4" copper tubing for a ProPress fitting only takes a short amount of time and helps ensure a solid seal. Here are some steps to follow:
- Make sure you’ve got a clean, square cut.
- Ream the tubing.
- Deburr the inside.
- Put the fitting on and mark the full insertion depth on the tubing.
- Attach and align the proper jaw/ring, pull trigger, Press!.
Maybe you thought using ProPress couldn’t get any easier. Follow these tips and it will be. Follow us on Instagram at @viegallc for even more insider how-to. Learn more about the ProPress system here.


